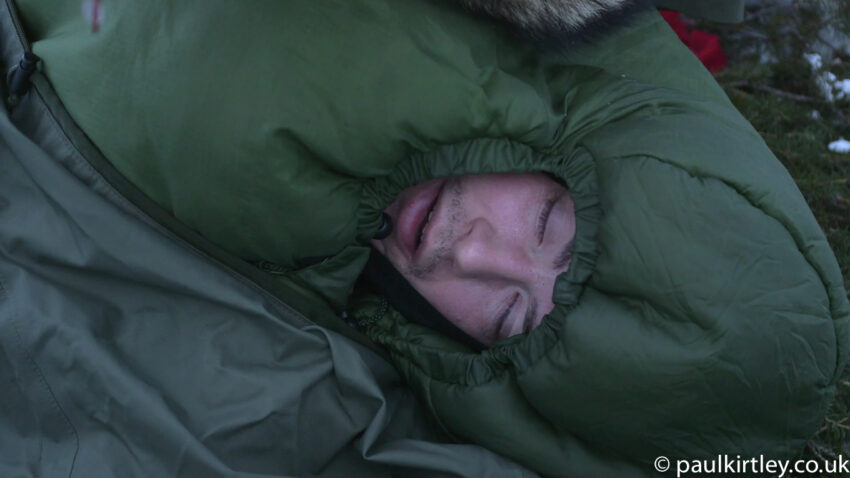
Winter Bivvying – How To Stay Warm In A World Of Cold
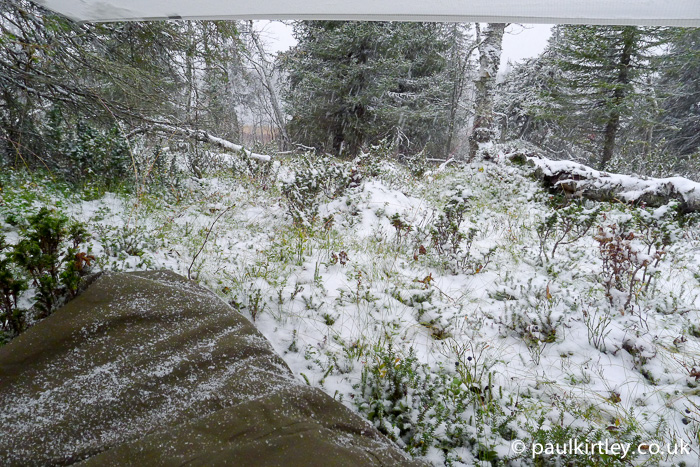
Winter means different things to different people. Moreover, the degree of winter conditions as you range from the tropics to higher latitudes varies immensely.
Equally, winter camping means different things to different people. It could be a hot tent in the boreal forest of Manitoba, or a mountain tent on a sub-Arctic plateau in Norway, or a tarp on a frosty January weekend in Yorkshire.
Of course there are multiple other permutations but if you are travelling in winter, more often than not there are three pieces of sleeping kit which are much less variable than the scenarios in which you might be using them – a sleeping bag, a sleeping mat and a bivvy bag.
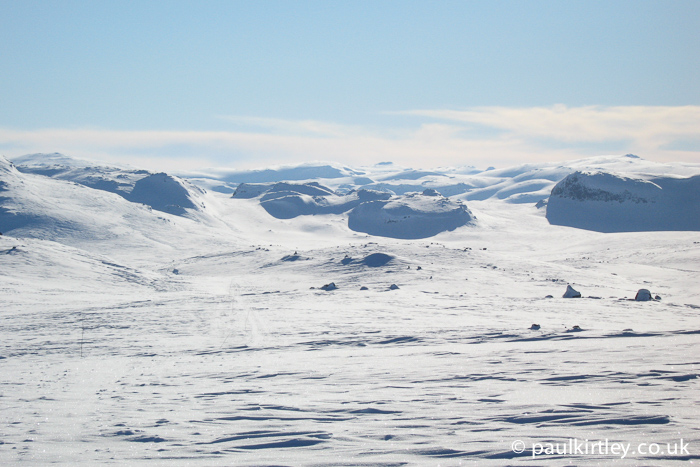
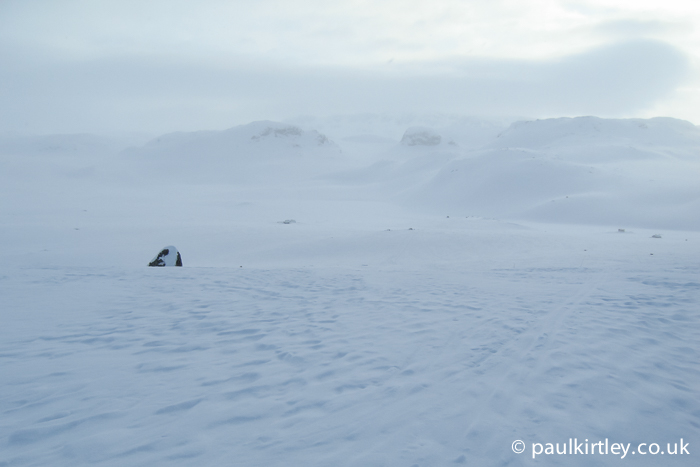
Indeed, even when I am making hut-to-hut ski tours in Norway and fully planning on sleeping in mountain huts each night, I carry a sleeping bag, a sleeping mat and a bivvy bag. In between the huts I’m in remote country and if I can’t make it to a hut – due to bad weather or injury, then I want to be able to bivvy in the prevailing conditions, whether that’s in a snow trench covered by slabs or a snow hole dug into a bank. Hence I need sleeping kit which is up to the job. Furthermore, sometimes we might plan to dig a more elaborate snow palace if there is no hut in a location convenient to our journey.
Even when my friends and I go on hot-tenting trips in the boreal forest, where we have a canvas tent and a wood-burning stove, we still take sleeping bags, bivvy bags and sleeping mats. A critical point is that the sleeping bag is rated for the expected external, environmental temperatures, not the internal heated tent temperature. We don’t always run the stove overnight and it quickly becomes only a few degrees warmer inside than outside. If you are sleeping next to the tent wall, there can also be condensation here, so a bivvy bag to protect your sleeping bag from moisture is a sensible precaution. I’m also a lot more comfortable knowing I can bivvy without the tent, which could be lost or damaged in a number of ways.
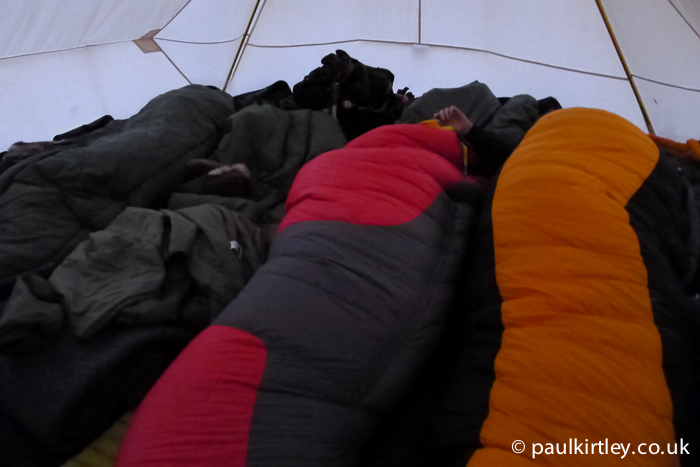
Bivvying out in winter does not necessarily mean you have to be in the northern forest, or even that there is snow on the ground. Winter bivvying can mean spanning a tarp between skeletal trees and waking to a frost on the leaf litter in the morning. Winter bivvying can mean a snow hole cut into windslab in the mountains. Winter bivvying can mean a snow grave dug in soft snow of the boreal forest, lined with spruce boughs. Winter bivvying can mean going to sleep on the green moss of the Arctic forest on a chilly September evening only to find snow on your bivvy bag in the morning. Again there are many varieties of winter bivvy and of course there are differences between them all, some considerable and obvious, others more subtle and nuanced.
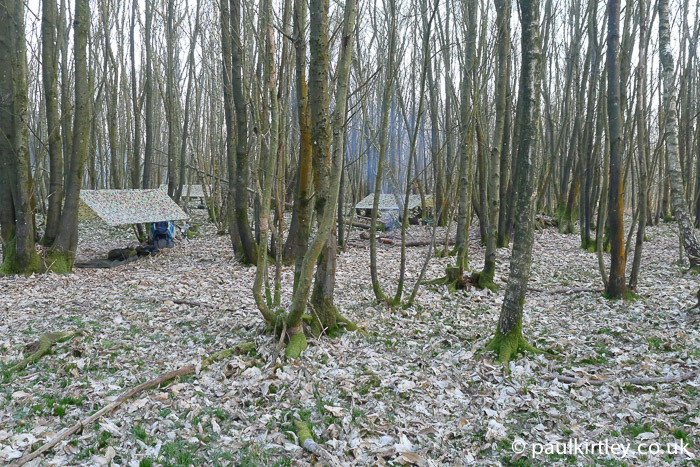
There are commonalities for every winter bivvy. Of course we want to get some rest. Keeping warm and staying safe are key objectives, and in winter the two overlap considerably.
Whenever you are sleeping out during the colder months of the year, you should be mindful of the ways in which you lose heat to the environment.
The five mechanisms of heat loss to the environment are convection, conduction, evaporation, respiration and radiation.
Convection, conduction and evaporation and the big three we primarily need to be concerned about while bivvying. Let’s take a look why…
Convection And Winter Bivvying
Convective heat loss occurs between a surface and a moving fluid or gas in contact with it. The air nearest your skin is warmed by the body. If this warm air is allowed to move away from your body, colder air will take its place and you will lose more heat in warming this cold air. To stay warm, you need to trap warm air near your body. It’s the air trapped in your sleep system that keeps you warm, not the material of the sleep system itself.
For a given environmental temperature, you need trap a quantity of air around your body such that it will insulate you against the cold; you need to warm that air with your body heat, without expending too much energy; then you need to keep it there.
This translates to having a sleeping bag with enough loft for the season, fitted with good baffles and drawcords and, if you are outside, a windproof outer bivvy bag. Bivvy bags are not just about keeping dry, they also make your sleeping bag windproof, just as your waterproof jacket helps protect you from cooling effects of wind. The bivvy bag should also be large enough to allow the sleeping bag to loft properly. In winter, this may mean using a bivvy bag which is larger than you would use in summer. Wearing a thermal base layer, socks and a hat will also help trap warm air directly next to your skin.
An allied consideration is keeping your sleeping kit clean. Dirty, greasy sleeping systems, lose some of their insulating properties. Down in sleeping bags can even become matted if dirty enough. Materials may also lose some of their breathability. Keeping your sleeping system clean keeps it effective in protecting you from the environment. This is another good reason for wearing a thermal base layer in your sleeping bag. Alternatively a silk sleeping bag liner is a good investment, particularly to protect expensive down bags. A further benefit of a bivvy bag – at any time of year – is that it keeps dust, dirt and detritus away from the outer surface of your sleeping bag and so also serves to help keep it clean as possible.
Conduction And Winter Bivvying
Heat loss through conduction comes through direct contact with cold surfaces or objects. How quickly heat is transmitted to an object depends on the conductivity of the materials from which the object is made. Metals are generally very good conductors of heat. Air is a poor conductor of heat (hence why it’s so good to have trapped in your sleeping kit). Water conducts heat away from your body about 25 times faster than air. The practical take-away from this fact is that if your clothes or sleeping kit are wet, you will conduct heat into them much more quickly than if they were dry.
The amount of heat you lose to an object depends on how much energy it would take to heat up the object. This, in turn, depends to a large extent on how cold the object is and how large the object is. On a cold day you could warm a small pebble in your hand but you will never warm a large boulder up to your body temperature by getting naked and hugging it! Equally, you are never going to warm up the Earth significantly by lying on it. If you are lying in contact with the ground in winter, or snow, a great deal of heat will be sucked out of you.
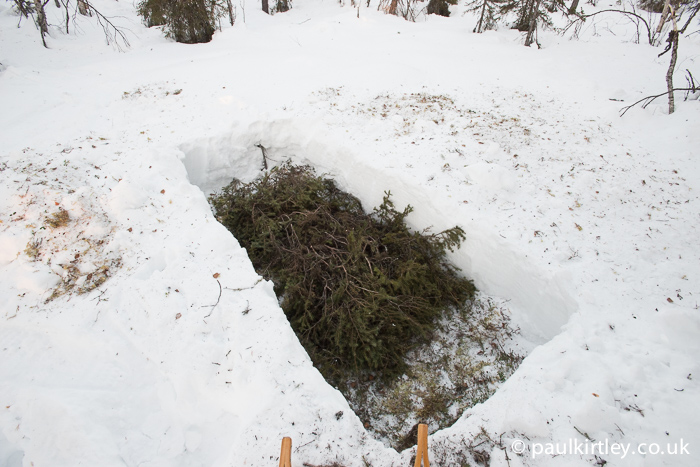
The practical take-away is to insulate your body from cold surfaces with a poor conductor. People generally know to use a sleeping mat when camping out. Most people use a sleeping mat because that’s what everyone else does. It’s the advice they were given in the camping store or by their friends. Some campers think it’s just about comfort. The reason most people use a camping mat is not because they’ve tried the alternative of not using one. But if you’ve ever tried sleeping out on the ground without one, you’ll be nodding your head in agreement here in that, even in summer, it’s a cold and unpleasant experience. In severe cold, you can augment your sleeping mat with other equipment such as your rucksack. You can also use natural materials such as spruce boughs if they are available.
Evaporation And Winter Bivvying
To convert a liquid to a vapour or a gas requires energy. In fact it takes a significant amount of energy – more than half a calorie per gram of water evaporated. Hence, evaporation is a very effective mechanism for getting rid of heat. It explains why sweating works so well at keeping you cool on a hot day. The flip side is that if you get wet in a cold environment, you can get very cold, very quickly. The practical take-away is to prevent environmental moisture from coming into contact with your sleeping system.
The environment, however, isn’t the only source of moisture. Even when you are not obviously sweating, your body is always moistening your skin through what is known as insensible perspiration. This occurs even in cold climates. During an 8-hour sleep it’s normal to lose about 350ml of water (an equivalent volume to a can of carbonated drink). Further, when you become too warm, you start to sweat, even during some stages of sleep. Then your clothing or bedding getting wet from sweat can be a bigger problem than water coming in from the environment.
Breathable fabrics, which allow perspiration to escape will help to an extent but you can still get sweaty and damp. Below about -20oC (-4oF) breathable membranes cease to function properly anyway (the water vapour condenses or even freezes before escaping the system).
So the practical take-away here is to minimise moisture production within your sleeping system. This brings us round to respiration.
Respiration And Winter Bivvying
As you breathe cold air, it is warmed before it gets to your lungs. You then breathe out warmed air so you are effectively losing heat every time you breathe. There’s nothing we can do about breathing. Holding our breath is a fairly short-term strategy for conserving heat. It’s a consolation then, that heat loss through breathing is relatively insignificant compared to convection, conduction and evaporation. There is another problem with breathing, though.
A common misconception, when sleeping outside in sub-zero (Celsius) temperatures, is you should put your head inside your sleeping bag to keep your warm breath inside your bag. People also worry about their face becoming too cold. The problem with having your face inside your sleeping bag is the quantity of moisture in your breath. As a result, there will be a significant amount of condensation inside the materials of your sleep system. At best this will cause damp patches in your sleep system, which will make you cold.
In low temperatures, the moisture from your breath will freeze inside your sleeping system. This will, of course, reduce the thermal efficiency of your system during the night. Worse, though, it may be impossible to remove unless you are able to air your sleeping system in a warm cabin or heated tent. The next night you will start from this reduced position, with less thermally efficient sleeping kit. Each night you breath into your sleeping bag, you will make it worse still. It will also become significantly heavier. So, wear a balaclava and breathe outside of your bag!
Radiation And Winter Bivvying
Heat loss from radiation does not occur only from exposed skin. Put another way, even if you are clothed, heat radiates from your body to your clothes, then from your clothes to your surrounding environment. This is a separate mechanism to conduction and convection, which insulating and wind-proof clothing or bedding does a fine job of significantly reducing. Radiating heat does not need a medium such as a conductor or a fluid or a gas. Just think about the heat of the Sun – travelling through the vacuum of space. The outside of your clothing or bedding will be radiating heat to the environment around it, provided the environment is colder, which we are assuming it will be because it is winter.
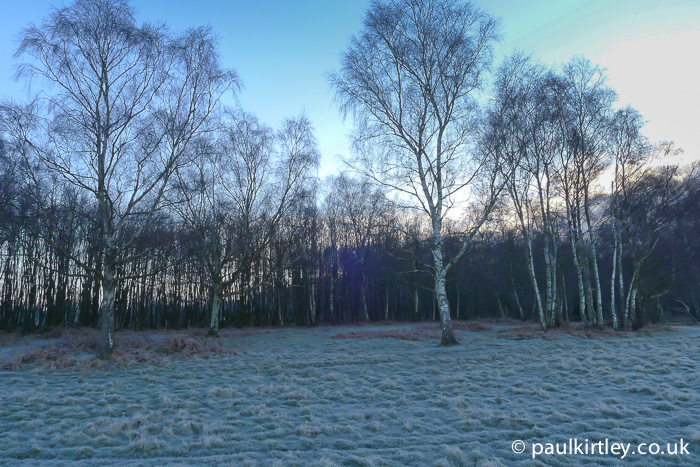
What is somewhat counter-intuitive is even though you might be a constant temperature, the colder the environment, the more heat you will radiate. It’s the temperature differential between you and the environment which is the determining factor in this equation. There is little you can do about the physical process of radiation but if you minimise the amount of body warmth reaching the outside of your clothing or sleep system through the other mechanisms of heat loss, then you will minimise radiation from your clothing to the surrounding environment. The good news is that radiant heat loss isn’t particularly significant compared to other mechanisms of heat-loss unless you are in a very cold environment, below -30oC to -35oC (below -20oF to -30oF). Despite the efforts of marketers to sell you silvered survival blankets, radiation is the least of your heat-loss worries.
High-Level Heat-Loss Prevention Take-Aways For Winter Bivvying
- Trap plenty of air around your body.
- Make your sleep system wind proof.
- Insulate your body from cold surfaces with a poor conductor.
- Protect your sleeping kit from moisture.
- Keep your sleeping kit clean.
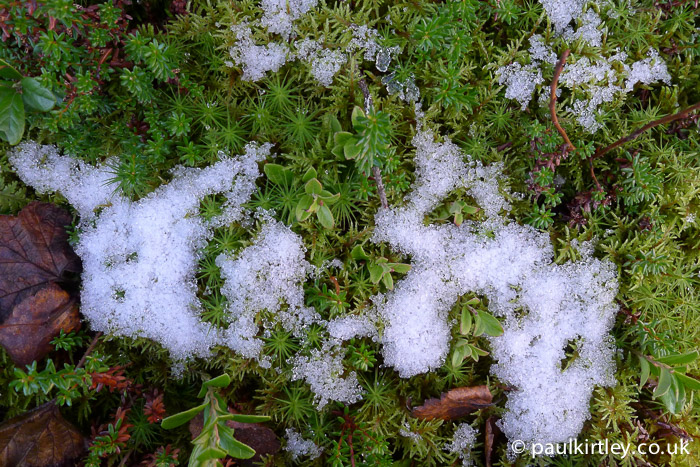
Practical Application In Winter Bivvying
The above points are all well and good but what do we actually do on a practical level to achieve these goals. What routines and protocols do we employ on a day-to-day basis in winter to make sure we maximise the use of our winter bivvy kit. Moreover, what do we do to prevent our sleeping kit degrading over time.
Don’t Scrimp On Sleeping Kit
Your selection of winter bivvy kit isn’t about just having a cosy night’s sleep. In extremis, it could also keep you alive in otherwise fatal conditions. Even if you don’t think you’ll be out in such extreme conditions, being cold and uncomfortable all night means lack of sleep which, in turn, means impaired reasoning, poorer decisions, reduction of attention span, lapses of concentration, impairment of short-term memory and reduced motivation.
In the outdoors none of this is beneficial. I’m sure you could come up with your own scenarios but I need only mention the use of axes or navigating across country in the context of the above effects of sleep deprivation and you understand where I’m coming from. So, make sure your sleeping kit is fit for the conditions, that your sleeping bag is rated for the season, your bivvy bag is large enough to hold your sleeping bag at full loft, that you have a good thermal base layer, hat and socks as well as a decent sleeping mat.
Consider Carefully Where You Set Up
The place you decide to bivvy can have a large bearing on how warm and comfortable your night will be. Warm air is lighter than cold air. Warm air rises, cold air sinks. We were all told this in science class at school. You maybe didn’t realise it at the time but you can now put this knowledge to valuable use in the wilderness to help you stay warm on the coldest of days. This might not surprise you.
What is surprising, however, is how localised cold spots can be. In sub zero temperatures, a small height difference can make a large difference in air temperature. Dropping down only a few feet can plunge you into an a pool of the coldest air in the area. Even in comparatively mild temperatures, dropping down a metre or two (three to six feet) can put in you colder air, which is also much more damp, leaving a heavy dew on you and all your equipment.
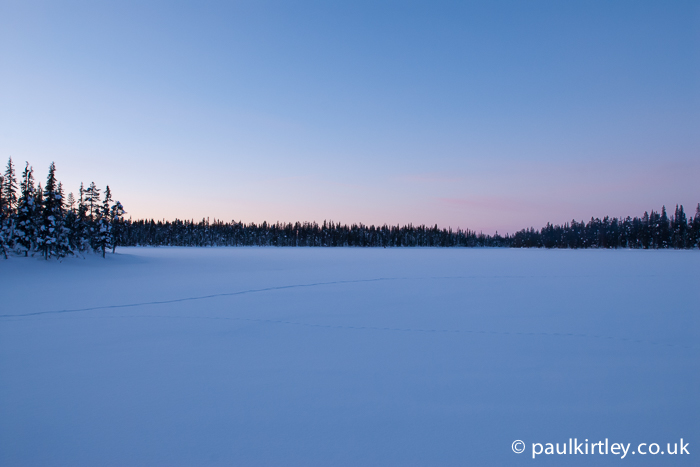
So it’s usually best to avoid the lowest ground in the locality. At the other end of the spectrum, seeking out the highest ground is rarely a great idea either. It’s usually more exposed to winds and may be more open to the elements in general. Whether you are digging up a quinzhee or stringing a tarp in the woods, somewhere in between the highest and lowest spots will serve you best. But even then be mindful of the fact that cold air will be literally flowing downhill. I’ve had the unpleasant experience of sleeping in a one-man quinzhee with cold air coming in the opening all night because this aperture was facing uphill on a very, very slight gradient. It was enough to make for a much colder night.
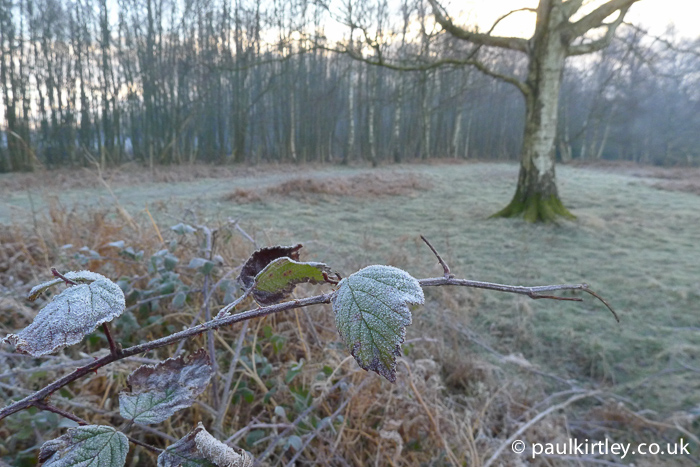
Also think about what is overhead. Just as it is warmer sleeping under a tarp than out in the open, so it is warmer sleeping in the woods, than in an adjacent field. The cover of trees, even deciduous trees devoid of leaves, can make degrees of difference. Indeed it can be frosty out in the fields but not in the woods. Of course, you should also take the usual precautions to look for hung-up windfall, dead tree crowns and other potential widow-makers before setting up camp.
As a final consideration, think about where you might set up so that while you remain sheltered from prevailing weather, you might benefit from the rising sun in the morning, to both warm your body and remove dew or frost from the locality of your camp as well as your kit.
Get The Winter Bivvy Basics Right
Most sleeping bags, especially winter models, come with both a shoulder baffle and a hood draw-cord. Use them. This may sound obvious to the seasoned camper but over the years I have been surprised by the number of people who do not know how to get the most from a sleeping bag. These days I make it part of a short briefing on the foundational courses I teach. Above, I mentioned trapping warm air around your body. The shoulder baffle and associated draw-cord do a very good job of keeping the warm air directly next to your body in place. The draw cord on a sleeping bag hood will also increase heat retention in very cold conditions. I tend to put on a hat before I draw up the hood but the two used in combination reduces the heat lost from your head significantly.
Lars Fält, with whom I had the pleasure of working on a good number of Arctic survival courses had a good way of summarising the next point. He said, when sleeping out in cold conditions, you should have “a lot over you, a lot under you, but little on you.” What he was alluding to was that you should have good insulation under you (your sleeping mat), good insulation over you (your sleeping bag) but shouldn’t wear too many clothes in your sleeping bag. The problem with wearing multiple layers of clothes in a sleeping bag is at some point, should you become too warm, you’ll start to sweat. This perspiration makes both your clothing and your sleeping equipment much more damp than it would otherwise be. And before you tell me you won’t get too warm, the reason it happens often is that people get into their bag already feeling cold, so they keep too many clothes on. Add to this that the sleeping bag feels cold (because it is cold), then people are reluctant to strip down to what they should be wearing. This results in people settling down with too many clothes on and when they do finally warm up, they continue too far the other way, ultimately overheating.
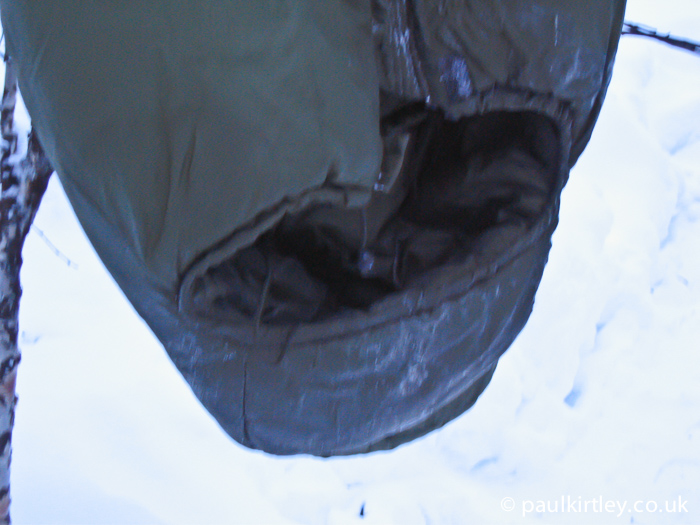
Provided your sleeping bag is properly rated for the season, you have a well-sized bivvy bag and you have a sufficiently insulating mat underneath you, you should be comfortably warm in your sleeping bag wearing only your base layer of thermals, socks and a hat. If conditions do become colder than expected, you can put an outer jacket over the top of your bivvy, like an extra blanket and put on a balaclava as well as your hat. You should carry one with you in winter and have it to hand, ready warmed in your sleeping bag when you go to bed.
Keep finger gloves and mittens inside with you too. This will mean they are not frigid in the morning when you go to put them on. In addition, if you find you have a cold spot on your hip as you lie on your side, then you can slip the gloves or mittens underneath to provide further insulation from the ground or snow underneath. Also in very cold conditions, to look after your feet, in addition to socks, you can wear the felt boot liners from your winter boots, if they have them. If not, consider carrying down or synthetic booties.
To prevent your boots from freezing solid overnight, first brush off any snow from the outside (you can carry a nail brush or vegetable brush for this job) then take the stuff sack from your sleeping bag, turn it inside out and place your boots inside, laying them flat. Then place the sack containing your boots at the bottom of your bivvy bag (another reason you need a bigger bivvy bag for very cold conditions). I often put this under my feet to provide extra separation from the cold underneath me. The boots being inside the sleeping system with you will keep them relatively warm.
Get Warm, Stay Warm
Get into your sleeping bag warm. This may sound obvious but what I mean here is make an intentional effort to be really warm before you get into your bag. If you’ve been outdoors all day, even if you’ve been near a campfire in the evening, you will likely be a little chilly just before bed. Spend five minutes warming up. Walk briskly, jog on the spot, do star jumps or other large muscle-group exercise which will get you warming up. Don’t work to the point where you are sweating (see the point above) bit where you start to feel the heat rising. Your sleeping kit will be at the ambient temperature or not much above it. When you get into it, heat will be transferred from your body to the sleeping bag. If you are already cold, this will make you feel colder and you may well feel cold for hours. Much better to be toasty when you get in and use a little excess heat to warm up your sleeping kit, bringing you back down to normal temperature, thus ensuring a more comfortable night.
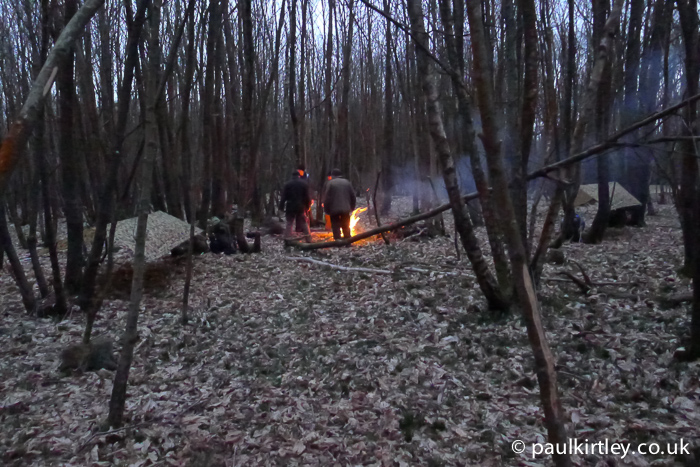
Before this, there is something you can do to help stay warm through the night. Have a good meal. If possible, make sure this has a good amount of protein in it, preferably meat. Processing meat is definitely thermogenic. Breaking down proteins also takes some time, so this process will continue for some hours after eating.
You should have a process for getting into your sleeping system quickly and efficiently. This will minimise heat loss to the environment as you get undressed. Have a place for everything you are wearing already pre-planned. Sit on your sleeping kit and sort your boots first. Then taking outer shell layers off and getting into the sleeping system with most upper layers still on works well. I then warm up the sleeping system before removing excess upper body layers. My clothes are used either as a pillow or a blanket over me. In very cold conditions, if you are out in the open, you can put a jacket of your face and breath through the sleeve like an elephant’s trunk. You will certainly have a damp armpit in the morning but it will keep your face warm and the moisture out of your main sleeping system. In getting up in the morning, reverse the process from the night before.
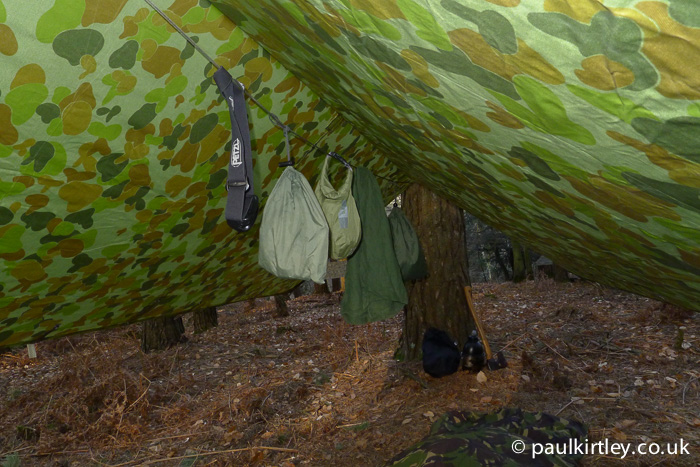
In cold conditions, you may need to pee during the night even if you don’t usually need to get up at home. The cold stress causes you to urinate more. Depending on where you are, a pee bottle can be useful for men but not an option for women. A wide-necked Nalgene bottle or MSR Dromedary works well. If you have to get up, the cold well of a snow shelter is preferable to going outside and you shouldn’t be proud. In a snow grave, you can use the edge of the snow grave, just off the area where you are sleeping. You should be able to stay on your sleeping kit, without needing to retrieve your boots. Depending on the configuration of your sleeping bag and bivvy bag zips, men may even be able to roll onto their sides, unzip and pee from there. While, this might be an unsavoury topic for some, it’s important to have thought this through. Don’t get cold in the middle of the night just because you need a pee. Have a duvet jacket or other warm layer handy – using it as a pillow is ideal – to throw on and keep yourself warm if you have to get out of your sleeping bag. Remember to close the bag up to preserve warmth in the bag.
Keep Your Winter Bivvy Kit Dry
It’s imperative you keep your sleeping kit as dry as possible.Moisture in your sleeping system has several effects. First, there is increased conductive heat loss to wet materials as water conducts heat relatively well.
There is a decrease in insulation if air is either displaced by water or the wetness of materials causes as a collapse in loft (as it certainly will with down fillings, for example). There is increased evaporative heat loss as moisture in the sleep system evaporates and takes heat with it.
Hence, it is critical that you do everything you can keep your sleep system dry. You must keep out environmental moisture. This can be in the form of precipitation, either rain or snow. Dew can also cause significant moisture to accumulate on your kit. A waterproof bivvy bag will form a very effective defence against all these sources of environmental moisture. A bivvy bag also protects your sleeping bag from damp or frozen ground and snow. Even in a snow hole or quinzhee, a bivvy bag is very useful to protect your sleeping bag from all the surrounding snow.
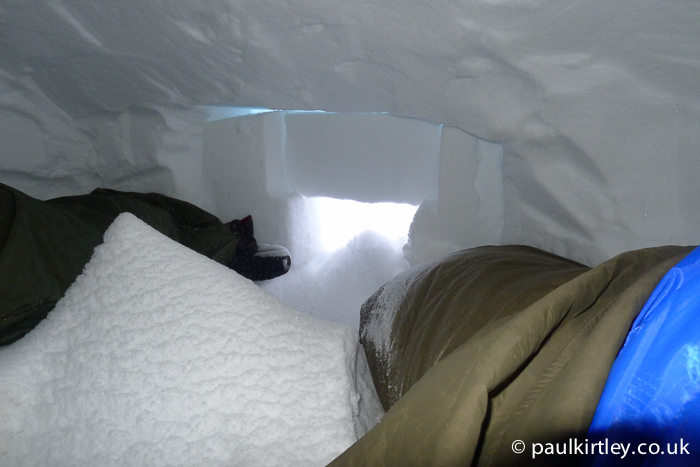
Remember you must also work to minimise the moisture coming from within, either through perspiration or through respiration. Remember not to wear too many clothes and don’t breath into your sleeping bag or bivvy bag. Also, be careful not to introduce snow into your sleeping kit when you get into it in the first place, which will melt and introduce moisture to the system. When in a snow hole or quinzhee it can be somewhat cramped. Sitting up in your sleeping system can be difficult or impossible. It is often awkward getting dressed or undressed. The aim of the game here is to minimise the amount of snow crystals knocked into your sleeping kit or onto your clothing.
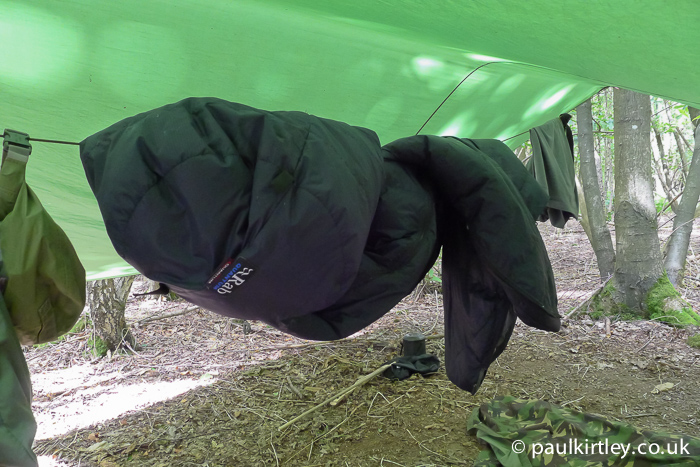
Even if you do all of the above, there will be some moisture caught in the system after you spend a night in it. To ensure your sleep system is in as good a condition as possible for the next night, it’s really important to rid the system of as much moisture as possible. If you can, air out your sleeping bag in the morning as soon as possible after you get out of it. At this stage it will still be warm and the warmth will help with evaporation of moisture. If you can get your sleeping kit into morning sunshine, even weak winter sunshine will have enough warmth in it to help drive off moisture.
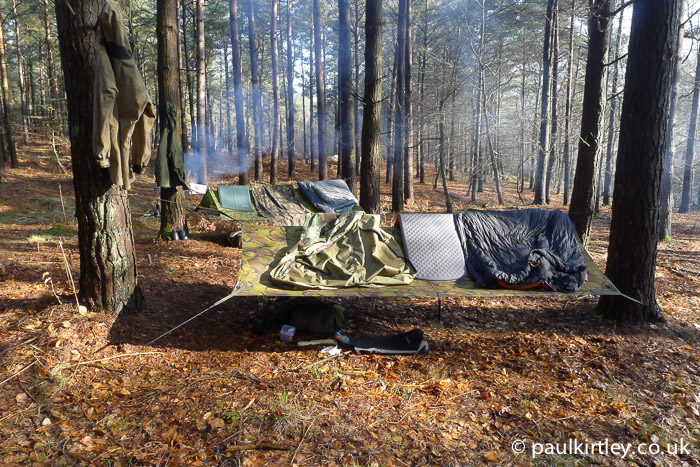
In cold conditions, bivvy bags can have frost on the inside, so turn them inside out to air them off. Even if it is severely cold, with no direct sunshine, hanging your sleeping kit will likely result in some of the moisture in your sleeping bag frosting on the outside. This can then be beaten off the bag, to remove it. Similarly the frost on the inside of the bivvy bag can be beaten off or shaken off. If the conditions aren’t so cold as to cause moisture to freeze on the surface of the materials, moisture can be reduced with some sun or a breeze or both.
Winter Bivvying – Pulling Everything Together
There are of course nuances and subtleties to each winter bivvy situation. The above general recommendations combined with a good understanding of the fundamental principles of how heat is lost to your environment plus how these apply specifically to the use of a bivvy, sleeping bag and sleeping mat combination, should significantly enhance your winter bivvy experiences if applied diligently. It won’t mean that every winter bivvy experience is a comfortable one, particularly if the bivvy is unplanned and the conditions are extreme. Understanding what you need to do, how to do it and having experience, will stand you in good stead to weather difficult situations and may just save your life.

Let Us Know Your Tales…
Have you had notable or memorable winter bivvying experiences you’d like to recount? Or tips you’d like to share? Let me and other readers know in the comments below.
Related Material On Paul Kirtley;s Blog
Winter Woodland Wildcamping: 21 Tips & Tricks
Staying Warm Outdoors: Avoid The Four Horsemen of Heat Loss
47 thoughts on “Winter Bivvying – How To Stay Warm In A World Of Cold”
The wide mouth Nalgene is great as a pee bottle and when you have used it throw it down by your feet as a warmer.
Also used the above filled with water just before the boil as a hot water bottle. Also this water is a little warmer in the morning than your other water supply and doesn’t take quite as long to boil for a morning brew.
Just remember which one is which in the morning…
ROFLOL!!! 🙂
Have a good one! 🙂 Kev B.
And never eat yellow snow!!! 😛
I really enjoyed reading this article, very informative and useful. It brought back a memory of working with young offenders in west Scotland, and awaking one morning on our campsite (which had been frozen ground on arrival) to see YO ‘Big John’ looking like death warmed up, and complaining bitterly of how cold he had been all night. He eventually admitted that he had left his karrimat behind to “save weight” and had shivered in his 4 season bag all night. On taking down his tent there was a perfect outline of his human form melted a inch or so down in the surface of the hard frozen sphagnum bog we were all on. The environment is a wonderful teaching aid!
Hi Paul
Good timing. I’m doing the Instructors course with JR at the moment and we’ve got the winter shelters to experience in December, so this advice will come in handy.
Hi Paul!
Thanks for the great article! Last week I worked on my tarp skills at my camp, and guess what? No rain! Thanks! I just wrote a message to my students about bringing the right sleeping bag for our camping trip this weekend. No one really understands the importance, do they? Everyone just buys a cheapie from Aldi, borrows one from a friend, or unearths one from 20 years ago and says “done”. It was my number one issue all summer. Number 2 was wrong clothing, and 3 was crappy tents. Anyway, I told them to bring their sleeping bag and then to pack an extra sleeping bag that was designed for 20 ° less than the temperature they are expecting.
The bivy bag will be my next item I will experiment with this winter. Thanks for all the advice and support. It is so good to read someone who understands my passion for the outdoors!
Hope to hear from you soon. Please keep the articles coming!
Keep smiling
Shawn
Great article, I’m a cold sleeper so always keen to hear techniques on keeping warm. Can I ask what make bivvy bag u prefer??
Good point about the shoes, never even thought about that.
In the beginning of October, i slept outside in a British army surplus Bivy bag i bought from a colleague of mine which i made into a “hunters roll” (everything rolled up, deployable in 10 seconds), while i slept in it fine, i ran into some problems:
– The sleeping mat did not stay put, it slid to the side during the night and exposed me to the cold. Annoying.
– I put my feet up during the night sleeping in a fetal position to warm up my extremities (feet under legs, hands crossed under arms/placed between thighs), when i put my feet back down during the morning the lower part was freezing cold. At least it made me wake up faster…
– I put on an additional layer of clothing at around 04:00. Coldest part of the night seems to be just before sunrise.
– After the whole thing, i bought a Balaclava so i could have my head on the outside, I had the Bivy bag as open a bit during the night to ventilate some condensation. Water vapour wasn’t a big problem, but getting fresh air in was. Even though the Goretex ventilated a bit, the heat inside became unbearable after a while.
A useful tip i picked up from reading about winter camping, is to keep your bottle(s) upside down since ice forms at the top of the water, and it should be a metallic bottle so it can be warmed up over a fire.
Great article
Although I do sleep in my clothes and almost always have done as it saves me weight on my back and why waste that $600- duvet parka?
A great article. I tend to winter camp in the woods, as it does protect you more from the cold. I put my mat inside my bivvi, along with a windscreen reflector with the silver side up to reflect the heat back. It seems to work. Cheers, Paul.
Very detailed and very informative article, Paul. Thank you for taking the time to write this up. It really gives you a chance to think through your own strategy and kit list when going out ‘camping’.
I will definitely share this with my groups. I have the same question, although could google it, which winter bivi bag would you recommend?
Thanks for this. Very thorough and comprehensive winter guide! I’m currently living in tropical conditions of sub-Saharan West Africa but looking forward to getting some winter camping in the uk again this winter. I found your explanation of the 5 main hear-loss modes very useful. Thanks Again Paul. Andy
Hi Paul,
Thanks for all your blogging. You have produced an absolute gold mine of information that I throughly enjoy reading and try to put into practice as often as I can.
In April this year I went for a 4 night solo walk in snowdonia, dry rations and purifying water. I hoped not to see another soul for the duration – and for the most part I did not.
I was using a bivi bag, roll mat, sleeping bag set-up
Two days and night went by with out a problem, the third night however did not go so well. I chose my spot well; about 10m above local ground level and in a slight belly which was protecting me from the wind coming up the valley. I set about making dinner and a brew, dusk was about two hours away – should be able to read a bit of my book before bed. At somepoint during cooking the wind changed direction (presumably from land to sea wind as the major thermals changed). I did not notice; I ate dinner, I read my book and drank liquorice tea. I glanced at the ridge line and sky and thought that cloud is going to drop over the top in a minute and soak me. I quickly packed everything away, took off my boots and jumped in my bivi. As I was stripping off my clothing I realised how cold my hands and legs were, then it started; the uncontrollable shivers – and the realisation that I could die if I don’t make the right decisions.
Options: make a brew….. wouldn’t be able to light the stove let alone pour the water in the mug.
Pack what I can and walk out: 10+k night time navigation, unknown terrain and hypothermic – now that is stoopid.
Call mountain rescue: not yet and I have no signal anyway.
Relocate, I was in the best spot in this valley and you never find a good location at night.
Sit tight and trust the kit: 4 hrs of shivering followed by two cups of tea and little light shivering I was warm enough to get some sleep.
Had I not had the right sleeping bag with me (4 season) I would have had to choose between the other options or do a mix of them. In all honesty I truely believe I was in a potential death scenario, I had given many location (8 figure grid reference) to my nearest and dearest earlier but had to get onto the ridge for signal.
The last night went very well and I changed plan and camped in a much closer location (2k) over easy terrain to the car.
Kinda got lost in previous post – the point of that is to highlight the importance of the right kit – and keeping it in good condition. And if it (or you) becomes compromised – change your plans.
Hello , I first want to say that your blog is one of the few that gives good common sense methods for being a woodsman…thankyou!
The most memorable thing I learned about winter in the woods I learned in Maine in January of 1980 during a survival course for the Navy…I am from Texas and know how to hydrate for the heat but didn’t realize how dehydrated one can become in the cold,staying hydrated can help your body work better to keep warm so that your time in the woods is more enjoyable.
Another great article Paul :0) Nice and timely as well.
Six of us are going to Stora sjofallet end of Jan/beginning of Feb, really looking forward to it!
Best, Dave
One time, and thankfully ONLY the one time I went to visit some friends in the woods near to where we were all living. When I arrived, they were just finishing setting up. I wasn’t planning on staying long but it got Really dark Really quickly and I had absolutely no kit! One of my friends offered me one of those Blaze Orange plastic bivi bags, which I accepted. We all slept around the fire, and around 3AM I woke up sweating and half frozen, the fire was all but out so I gathered some twigs and dead branches and set about getting the fire going. Around 3:30am found an ember and placed the twigs a few at a time getting the ember to grow so I added eve more and was blowing with all of my lung capacity, and by the grace of God it BURST into a flame. Up to that point I had never been so happy! started to add the larger branches and by the time the others woke-up (around 7am ish) I had a nice small to medium fire going, and was starting to warm up. my friends then asked me how I lit the fire after it had gone out, and proceeded to tell the tale of the I would NEVER forget! 🙂
The moral of the story, “If” you go into the woods and don’t intend to stay all night… TAKE A STUPID TORCH! LOL! 😀
Have a good (And safe) one! 🙂 Kev B.
Hi Paul,
A very informative article, as usual! Thank you for taking the time to share your experience.
My family are from a travelling background and I learned the following about keeping warm on cold nights in a temperate climate.
When you first get under the blanket, sleeping bag, or whatever cover, you inhale on the outside of the cover and then slowly exhale on the inside. You do this for just a few breaths, not more than about 20. In which time you should feel quite a bit warmer. After that, you wrap up your head to prevent further heat loss and keep all breathing on the outside to prevent condensation
We always say
Start warm and keep warm
I think that is probably true in most circumstances
Very good videos and articals you make.I really enjoin them and kind of Your English is for me as foreiner very understandable.
Nice article Paul. I’m mostly in the Spanish Sierra Nevada and above the tree line. Although we don’t have extreme cold here it does get quite chilly and the cyclonic winds make a tarp impractical. A rock overhang is my usual means of protection and you soon learn to spot a good one. See my YouTube ‘stevebungay Mulhacen in winter ‘ to get a flavour of what it’s like here. Keeping warm with a light load can be a challenge and I’ve thought about trying a vapour barrier. Do you have any thoughts on that ?
Very interesting and illuminating article, I took a lot away from it. many thanks.
There are a lot of the simple things that make a difference like wearing head gear. Easy I know but fundamental and of course keeping kit dry is critical. I remember ‘Parachute Regiment’ training many years ago and how wet our kit would get. How we survived I’m not sure. I guess we just toughed it out. Suffice to say things are done differently now. All the very Paul and thank you once again. Mark.
Very interesting and useful article, Paul! Thank you!
Very interesting and useful article, Paul! Thank you!
Really bewt article this. I was wondering how you coped with the whiteout. Did you stop straight away & prepare as you saw it arriving ahead?
Thanks.
Hi Paul.
Interesting article you have reminds me years ago hiking through the Welsh Mountains and needing to make camp. The cloud was down and getting dark so everything seemed wet when we discovered an old sheep pen and pig shelter.
We pulled out some dry droppings but found the earth completely dry, we erected some old corrugated iron roofing to stop the wind howling through and spent a dry night safe and snug.
On waking the next day we were at an old stock pen high up in the hills which was totally deserted.
I had inquired about making use of the animal dung to make some sort of fire with it but was out voted. I still have happy memories of that night after all these years.
Regards.
J
May be, that i didn’t find it, but my impression is, looking to your fotos too, that you are camping in moderate cold conditions under an A frame tarp construction and recommend that to people.
If I am camping in colder conditions than positiv 20 *C I construct a lean to poncho shelter ore something like that, to protect me against wind and make a fire in front of it, so that the tarp can trap the heat in and reflect it a bit to my back.
Did I go to often to the south of France, or did you go to often for winter camping with Sami and Inuit?
Did you simply forget to speak about that in your 21 tips for wintercamping, or is it in your private opinion really like this, that every thing higher than negative 15 *C is summer, and winter means igloo camping???
In my opinon for a small group in cold conditions its most times the best, to construct a nearly closed circle of lean to shelters around a fire. Wy don’t you recommend this at first? Ok when you are sleeping in a winter sleeping bag, you do not need the fire, but its simply warmer when you sit around the fire!
Marcus
Marcus, I think you need to stop viewing every single article on this site as a complete treatise about the conditions or situation you have in mind.
Maybe it is a language translation issue but the clue is in the title primarily and then in the text secondarily.
This article is about optimising the use of the combination of sleeping out with a bivvy bag and sleeping bag, providing general considerations and advice in any conditions below zero Celsius. The title of the piece is “Winter Bivvying…”.
Some of the photos are indeed involving a tarp (which does help in cold conditions – the car port effect) but others are in snow holes. Photos are from multiple countries in Europe and Scandiavia.
There are many other articles on this site covering lean-tos, snow shelters, use of fires, fire lighting, etc, etc.
Not every article covers everything.
Specifically regarding the 21 tips about winter camping, that was about winter camping in temperate conditions and I was very clear in the video that it was in response to a specific question and to be viewed in conjunction with the video from the person (Zed) who posed the question to me.
Best,
Paul
Nice one fella.
Cheers!
Hi Paul,
Thanks for an easy to understand guide to the causes of getting cold when bivvying, and how to avoid making the simple, but temperature sapping, errors. With these guidelines all of us should be able to get a far more comfortable night.
All the best, Dave.
Dear Paul,
Good article thank you. I also like to make a hottie by pouring hot water inside a water bottle that I place inside my socks. It dries the socks and warmup the bag. Warming stones around the camp fire and burying those under the mat before going to sleep helps as well. Having a brew ready in a thermos for the 4am shiver is enjoyable. In the military, I liked to sleep with a fleece overalls inside a lighter sleeping bag. So when I had to leave the bag in the middle of the night for a few hours, I was keeping some of my warmth with me. A sleeping bag that have some openings for the arms is great to cook or to do static work on the camp site. In my unit, sleeping bags had opposite zippers that could be joined if one guy was in trouble. It helps also if one bag is lost or too wet. Three guys can sleep on the flank in two combined sleeping bags. But that’s miserable. It is just an immobile wait…haha better get organized!!
As my experiences grow I find this kind of article far more useful and interesting than say ”how to light a fire” Of course there is a place for that too but I’m realising now that any kind of real expedition is going to require the kind of knowledge in an article like this. The extreme level of detail contained always brings light to something that now seems like common sense! Such as when explaining the different methods of heat loss… the way you describe heating up a pebble as apposed to a large boulder describes it in a way that makes so much sense!
It means you can take the information here not just as it’s written but understand it fully and use what’s learnt here and apply it to other situations to give a wider more educational result as a reader.
Hi Liam, I really appreciate this comment. It’s good to read you are looking deeper into the details of these articles as well as looking to deepen your own knowledge and experience. I’m very happy the analogies I use are useful in embedding the concepts I’m sharing. I’m particularly pleased you see how these principles can be applied more broadly once you fully assimilate them. Good stuff!
Cheers,
Paul
Paul,
In the 70s I used to go solo on ten day snowshoeing backpacking trips in the High Adirondacks and along the ridges of the Green mountains (ski resort to ski resort)
I did not bivi, I carried a Eureka Timberline freestanding tent for ease of setup. Although I practiced with snow trenches in the flat deep snow.
Boots and water in my sleeping bag, and a bar of chocolate before going to sleep.
I carried a lighter bag, so I slept in my insulated parka and insulated legging, with the windshell clothing over my bag.
-20 F was the standard temperature
So, I can say what an excellent and comprehensive article you have written
The way you write is good for both the beginner and advanced
I really enjoy your work
Regards
Neeman
Thank you for your kind words Neeman. As always it’s good to hear form you and I appreciate you sharing your thoughts and experiences here too.
Warm regards,
Paul
Any questions? Not after that article.
Thanks Vic. Glad it was helpful.
Thanks Paul.
It’s interesting to read the comments as they clarify, or muddle, the article so well. ha! ha! Yes, all these principles of cold camping are lessons from experience that ought to be heeded. I’ve cold camped with my wife, sometimes with no snow, but below zero C temp, and sometime snow surprised us where we had to re-think our camp. We recently camped on Canadian Thanksgiving weekend, expecting only cold, so my tent fly was not expected to accept the heavy snow that fell on the third day, and as my ridge line sagged the tarp from one foot above the tent to nearly crushing the tent. Therefore, we decided to strike camp. By the time we had packed up the tent and sleeping gear, the fly tarp had accumulated probably over 50 to 60 kilos of snow. We were well suited to sleep toasty warm, just not well suited for the snow load. Time to take out the canvas tent!
Cheers!
Marcel
Hi Marcel,
Yes, the comments section can be fun to work your way through 🙂
Experiences as you describe are invaluable. You can’t learn to optimally operate in an environment by studying in a vacuum. You eventually have to get out and apply, learn, iterate…
And yes, a canvas hot tent is a lovely luxury to turn to… 🙂
Warm regards,
Paul
I see there is a Oz hootchie in use.
How does it rate in Winter conditions…particularly in snow?
Cheers,
Linz
Hi Linz, the Aus hootchies are very resilient. They work well in cold conditions, even for the covering of a snow shelter in the boreal forest.
Warm regards,
Paul
Great article.
I was looking for stuff on wet weather mountain environment bivouacs. Good advice on small tarps as shelters, but what to put under the bivvy bag?!?
A tarp underneath is great when the ground is wet but collects puddles when it rains. Tried with an inflatable sleeping mat but have great trouble staying on top of it-so now lives inside the bivvy bag….Suggestions welcome!
Hi Paul,
I often wonder if I’ve been foolish selling my winter sleeping bag!
Fell ill! Sailed close to the wind! In recovery, looked like I’d never camp again! Sold most of my gear! Then hope, possibly summer camping. Bought a good summer bag! To be honest, it’s obviously got higher elevations in mind with regard to its temperature ranges. Comfort of zero degrees, with a limit of -5. However, I’m now ready to push for winter camps.
Forcibly retired means low funds and limited capability rules out the military stuff, so, I need to stretch this bag.
I’ve had it down to around five degrees (inside a tent, colder outside) and was okay. Following night a bit colder, I used handwarmers in the bag and my Snugpak Sleeka Softie jacket over the top, and I was toasty. I have a jungle blanket I can add to the mix along with a British army goretex bivi bag. I’ll need to give it a push and see how it goes but I can assure you, the car isn’t going to be far away. Wish me luck please lol, and any advice appreciated.
Lots of good info here Paul. I’ve bivvied in sub-zero temperatures in the UK, sometimes with snow sometimes without. I like to have a beanie hat which can be worn on the head but can also be rolled down over the face while
I’m in my sleeping bag. Yes, it will get damp from your breath but will dry out quickly if it’s made of wool. It acts as a kind of nose extension in that you get a little microclimate which slightly warms the cold air you’re breathing in and I find it keeps me generally a bit warmer. It probably won’t be so effective in extreme cold, but works in the conditions I’ve encountered. Nalgene make a large capacity (1.4l), wide neck flexi bottle, or Cantene as they call them, which makes a great pee-bottle which packs away small when empty. Probably a good idea to remind people to take batteries and battery powered devices into their beds with them too, so that the cold doesn’t sap the power. None of this is important for me just now: the woodburner in our shepherd’s hut is cranking out plenty of heat!
Hi Steve, thanks, as always, for your comments. Good point to remember about batteries in particular.
Enjoy your woodburner! 🙂
Warm regards,
Paul
I was in Sweden in February 2023 with a bunch in the woods. We had a hot tent, however we also had a chance to spend a night sleeping out under a tree. We each had our own tree. I cut a sink hole, put that snow on top of the existing snow under the tree to make a bench. Put spruce boughs as an insulation layer. Built up walls around the outside perimiter where the snow had already fallen off the trees boughs. I used a bivvy bag, a sleeping bag (which barely made the grade) and added a liner. I then put my mothership coat over the top. I was very nicely warm at -8* . The main problem I had was with getting dressed and undressed and sorting my clothing out. It was my first time sleeping in such conditions in this way.
Points learnt;
1) If you leave your boots outside they will be frozen in the morning.
2) Getting undressed to put on my sleeping base layers was quite a faff. Where do you put everything else? What I did was put all my day base layers in the sleeping bag. My day cloths went between sleeping bag and bivvy bag.
3) I knew about thick socks, hat and snood to sleep in. I was very warm.
4) The slight problem I had was the tree kept shedding very fine snow all night. My blanket coat was covered, not a problem. However my head, mainly my face and and outer sleeping bag got wet from the fine snow falling.
I also was one of only two of us to sleep out for a 2nd night in the same place with temps down to -22*. It was a much more challenging night to keep warm enough, that is when I found out thet my bag was slightly lacking. No fine snow on the 2nd night so no wet head but much colder.
My remaining questions are should I have kept my day base layers (merino) on to sleep in, they wernt noticeably wet. Instead of changing into my sleep base layers.
How could I have kept the snow off my face ?
I clearly need a slightly uprated sleeping bag. As I am going back again in 2024 in February.
Hi Shane, thanks for your comments and follow-up questions. It sounds like you had a good experience, certainly a good learning experience.
To answer your questions –
I never change into new thermal baselayers when bivvying in the snow. You just get too cold getting changed in the open and then there are more clothes to deal with in the bivvy. When doing winter trips, while I do change my actual underwear (merino wool boxers from Icebreaker), I can happily live in the same long johns and base layer top for weeks on end. I would recommend you don’t change these layers when getting into or out of a winter bivvy. Concentrate on efficiently removing your outer layers then getting in, then in the morning, concentrate on donning your outer layers while retaining as much warmth as possible. The latter is critical when temperatures drop into the low 20s and 30s.
In terms of the issue with the tree shedding fine snow. First, if you can, before you build your bivvy, knock as much snow off the tree as possible. With smaller trees, that you can shake and get some movement in the trunk, you’ll get a lot of the snow to fall off. Put your hood up first. You can even hit the trunk with the poll of your axe a couple of times. The latter works well with stiffer trees. But with larger trees you may not be able to dislodge everything and even a slight breeze overnight can bring down fine snow onto you. In this case one option would be to use the trick of putting a jacket over your face breathing through the sleeve. This was mentioned in the article for keeping cold air off your face but will also keep snow off as well. Another option is to use your snow shoes or skis to construct the frame of a cover over your head area, then lay your shell jacket (not mothership thermal jacket) over the frame to keep snow off your head. The latter is easier to set up with skis. Traditional snowshoes work better than modern, small snowshoes. The latter are not really long enough. If that’s what you are wearing, then a couple of poles, cut from the forest will work better.
I hope this helps.
Warm regards,
Paul