10 Bushcraft & Survival Skills To Try This Winter

Winter is a time when many people semi-hibernate, spending much less time outdoors than in the summer.
I’m not sure why, as I love experiencing all the seasons.
I know many readers of this blog feel the same way.
There’s nothing quite like a walk in the woods or across the fields on a cold, crisp winter’s day, where every breath hangs visibly in the air.
There are plenty of bushcraft and survival skills you can be practising during the winter months too.
Here’s 10 suggestions to get you started…
1. Fire Lighting
Whatever your level of competency in lighting fires, or whatever method you are contemplating – from hand drill to matches – it’s harder in the cold, damp conditions of winter than it is in warm, dry conditions of summer. Winter conditions are also when a fire makes more of a difference to your wellbeing. You benefit more from having a fire in the winter. A good fire warms you through and removes moisture from your clothes. It gives you light to work by on those long, dark evenings.
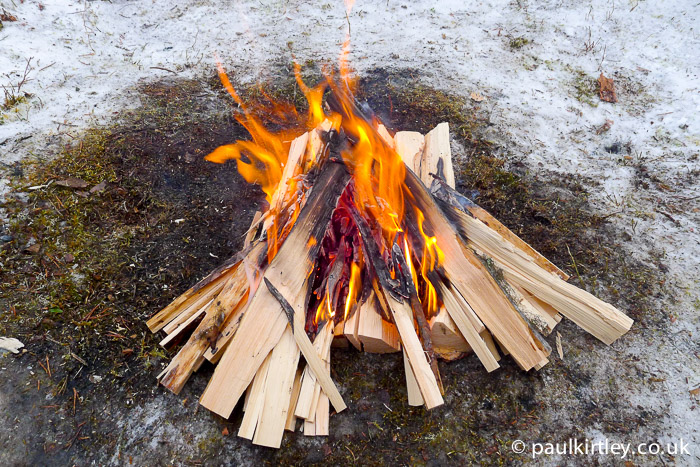
Get out and apply fire skills you already know from summertime trips to the woods. Then look to extend what you can do – perfect it in the winter and by the time summer comes around, it’ll be a doddle. In particular, reduce your reliance on man-made materials. Force yourself not to use cotton wool, Vaseline, BBQ fire-starters, hexamine blocks or the like. Concentrate on using only natural materials for every component of the fire lay, including tinder.
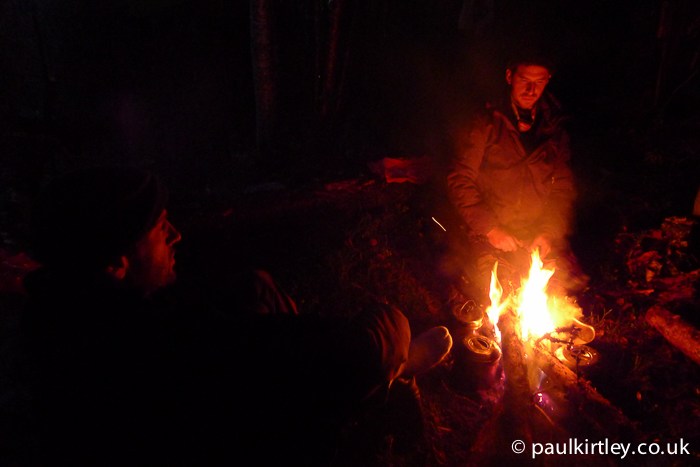
Even if you are used to using only natural tinder in the summer, they will be in a different condition in winter and your favourites may not be available at all. Focus on sourcing dry kindling and dead, dry standing wood (harder in winter when there are no leaves). Going out in winter and applying what works in summer, forces you to refocus and refine your skills so they work without fail year-round. Winter is the time to push your fire lighting skills on to the next level.
2. Animal Tracking
While some bushcraft skills such as establishing a fire are harder in the winter, if there is snow on the ground, animal tracking is easier. Snow shows up so much more detail than is available across grass or leaf litter for example. Even the seasoned tracker can’t help but be enthralled by the range of animal activity writ large in the woods and fields.
Winter conditions are a great time to start animal tracking. On snow you will see many more clear prints than on any other surface with the exception of sand. The animal that left the tracks is easier to identify and you can become familiar with whole footprints whereas at other times of the year, you may only see a partial print. Being able to identify the clear print will help you at other times.
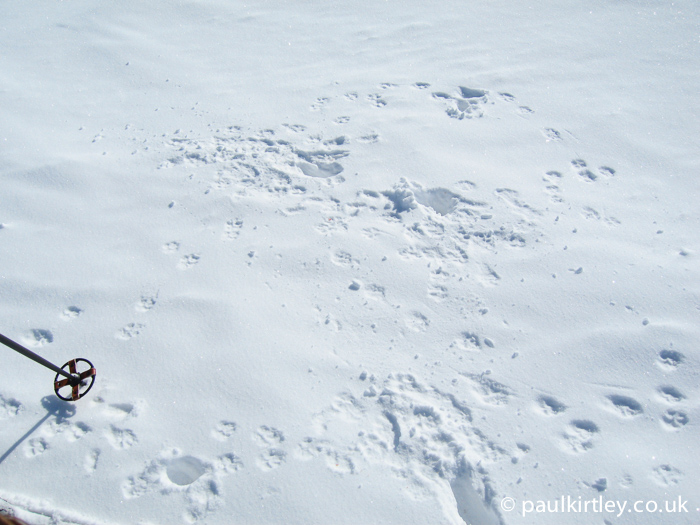
When looking at animal tracks on snow, it’s also much easier to piece together the whole track. While in summer you may come across some nice clear prints of a fox or a badger on the soft mud of a woodland track, when they then diverge from the track and head off across leaf litter it’s harder for the beginner to form a track picture. On snow the whole track is captured and you can build the track picture much more easily.
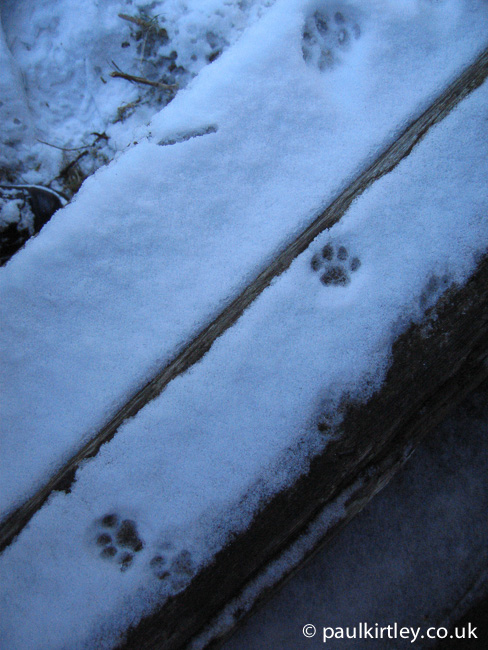
Because the track picture is clearer, you can observe the evidence of certain activities and behaviours which would be much harder to decipher or which you would miss altogether when there was no snow on the ground. Even an experienced tracker will be able to glean much more information in snowy circumstances. Don’t forget, either, some animals will also display certain behaviours only on the snow, not at other times of the year.
Winter a great time of year to become more involved in animal tracking.
3. Building A Snow Shelter
You don’t have to be in the arctic or in the mountains to have enough snow to build a shelter from it.
I have fond memories of building snow shelters when I was a teenager in the north east of England. We had several winters when there were large dumps of snow and we took advantage of it, getting out into the fields and digging into the snow where it had drifted up against walls.
Since then I’ve made many trips to snowy parts of the world and have built and used snow shelters from the Scottish Highlands to the Norwegian mountains to the arctic northern forest.
You basically have two types of snow shelter you can build.
The first is where you cut blocks of compacted, transformed snow and use them for construction. The classic form, which everyone knows is the igloo but there are other forms too, such as digging a trench into the snow then using cut blocks to create an angled roof over the trench in an inverted V-shape.
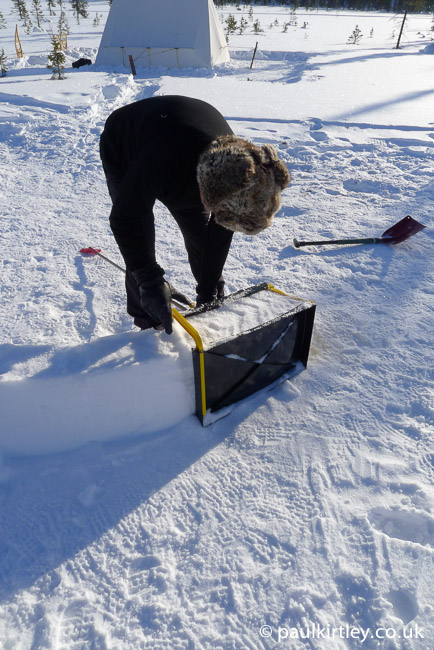
The type of snow you need for blocks tends to occur where the snow is blown around by the wind, smashing the delicate arms from the snow crystals and transforming the snowpack into a solid, more compact mass. It’s sometimes referred to as wind slab. These days you can also buy a device that compacts fluffy snow to create blocks but the efficiency of the device is very dependent on temperature.
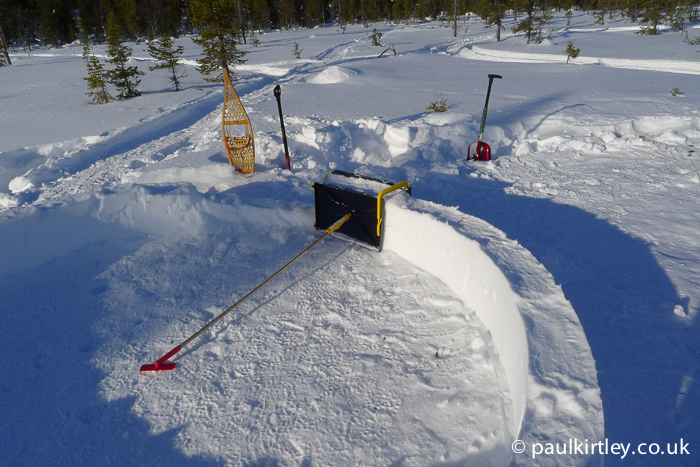
The second main type of snow shelter is where you dig into an existing pile of snow. This snow can have accumulated naturally through drifting into a hollow or consolidating on a slope. Alternatively, you can create your own pile of snow by digging it up into a mound, compacting and transforming it by trampling it, followed by digging out the centre once the mound has frozen – the classic quinzhee.
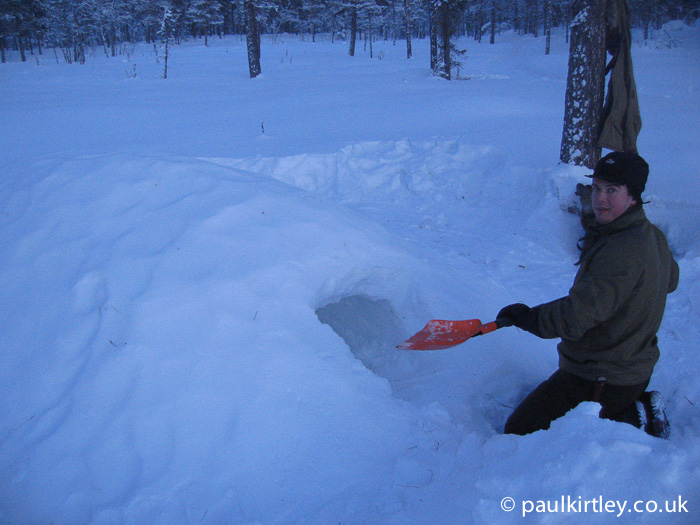
Snow shelters shouldn’t be seen only as an emergency survival shelter, although they are very good for this. You can plan to use a snow shelter as part of your camping strategy on a journey. They are much more weather-proof than a mountain tent for example. They are quieter and more robust in windy conditions. They are also surprisingly warm. Air trapped in the snow means these shelters are well insulated from perilously low temperatures and wind chill outside. You can easily achieve an indoor temperature of just below freezing from only body warmth and a candle, while it is thirty below outside.
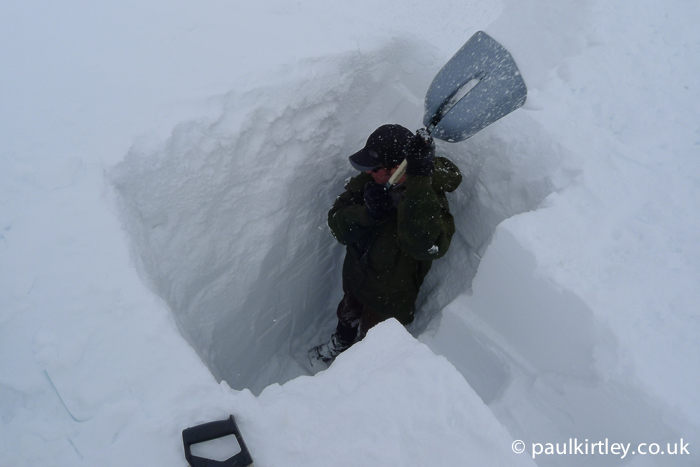
In a winter environment, a knowledge of snow shelters is useful and an essential survival skill for dangerously cold winter environments. They can also be a fun adventure, even in your back garden. If you get the chance this winter, I’d heartily recommend you try sleeping out in the snow.
4. Go For A Night Hike and Improve Your Navigation
In winter the days are short and the nights are dark and long. Compared to the long days of summer, it can be hard to fit much in the way of outdoor activities into the few hours of winter daylight. It is, however, a fantastic time of year to practise skills which benefit from the cover of darkness. One good piece of advice I received before I did my Mountain Leader Award several years ago was to avoid doing the assessment in the middle of summer. The reasoning was straightforward – it gets dark late and you end up undertaking the night navigation exercises at 2am, which makes you very tired the next day.
Even if you have no intention of moving around at night, night navigation exercises are very valuable. I use night navigation on courses as a great training aid. With a half-decent head-torch at night, your range of visibility is still very low compared to in full daylight. This means you have to take more notice of small features and concentrate more of the time on keeping track of exactly where you are. This is similar to navigating in dense woodland even during the day as well as in the hills when weather conditions deteriorate. Night navigation sharpens up your map and compass skills no end and these can be applied in more challenging situations which may occur even during daylight hours. Night navigation is also a lot of fun. It’s exhilarating to be out in the dark, finding your way.
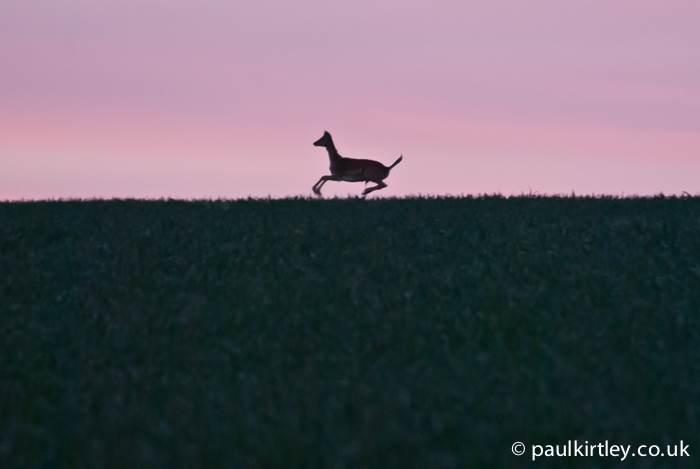
Many animals are crepuscular or nocturnal. Staying out as it gets dark you’ll see things those who head home at dusk never see. Plus sounds travel further in cold damp, air and you’ll pick up on faint sounds of nature you wouldn’t at warmer times of the year. The flip side is when snow is on the ground; it’s easier to see where you are going because of the reflected light but snow dampens all the sounds dramatically.
5. Learn New Constellations
Bushcraft centres on the study of nature. The stars in the heavens are part of nature, even if they are less tangible than the ground beneath our feet or the trees, plants and animals that surround us in the great outdoors.
Studying the sky is interesting in its own right. It’s a source of great beauty. Learning the constellations, asterisms and stars is also useful.
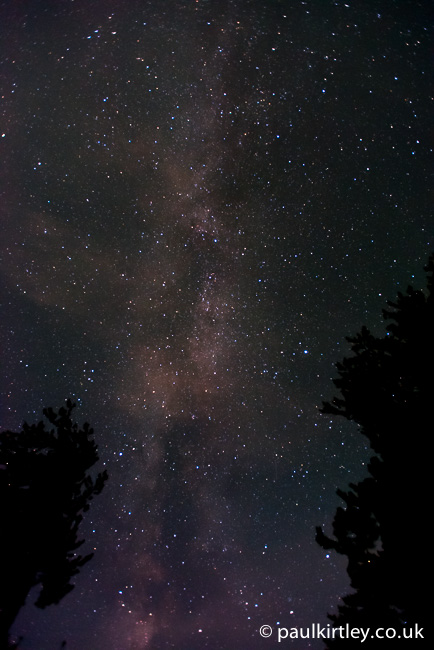
Polynesian islanders in the South Pacific were famed for their ability to navigate large distances at sea and accurately sail from island to island, using their knowledge of the stars.
Improving your own knowledge of the heavens, the relative positions of stars and how they move over the course a night, as well as the seasons, will significantly improve your natural navigation abilities.
While the winter sky is somewhat different to the summer sky, it is dark for many more hours in winter than it is in summer – a great opportunity to get out and study the stars in more detail.
6. Winter Tree Identification
Identifying deciduous trees in winter can be challenging. This challenge is worthwhile, however, as it not only improves your ability to identify useful resources in the colder months of the year, it also improves your identification skills year-round.
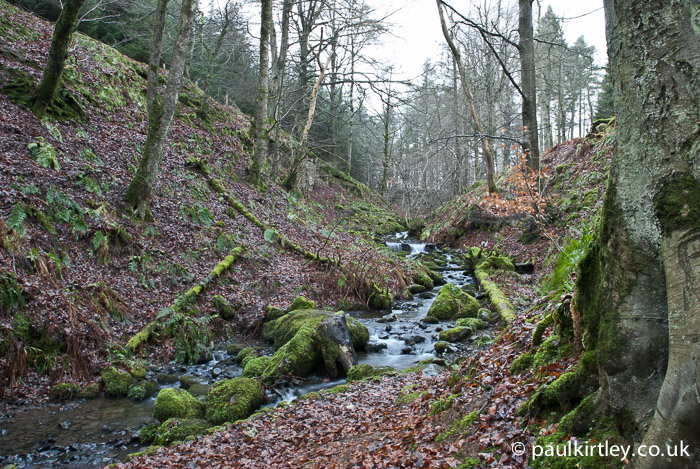
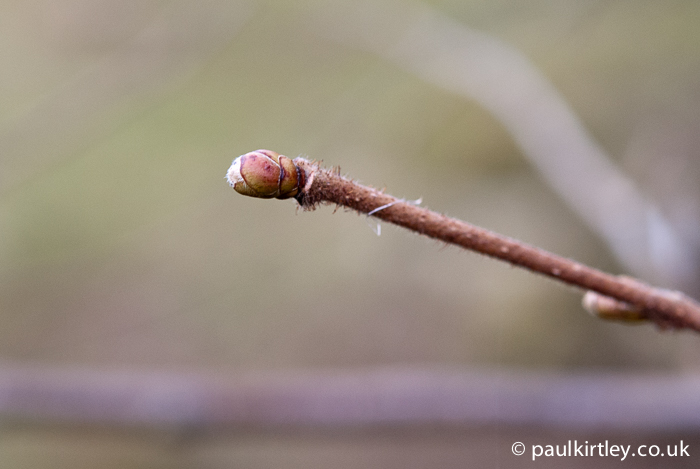
Most of the features you will have to rely on for identification in winter are present in the spring, summer or autumn too. It’s just that we tend to get lazy and look at leaves or flowers or fruit for ID purposes and ignore other, smaller details, such as the hairiness of the shoots of hazel, for example.
Identifying evergreens tends to be more challenging than deciduous trees despite the presence of leaves year round. The leaves of evergreens often take the form of needles. There are many similarities between the various needled species and the differences can be subtle. There are also a lot of them, particularly with so many introduced species from around the world. But, again, at a time of year when the deciduous trees have lost their leaves and many ground cover plants have died right back, why not spend some of your time in the winter months focusing on improving your identification of needled trees? When spring arrives you can then concentrate on species that are coming into leaf or emerging from the ground.
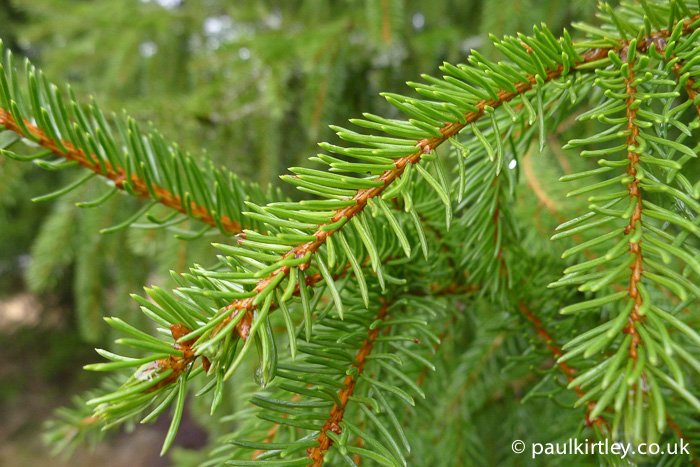
Even though the woods and hedgerows can seem dormant in winter, there is much still to study and in fact there is benefit in concentrating on what is visible, without the abundance of summer crowding out the identification details which are present year-round.
7. Make A Lantern or Torch
Did I already mention it’s darker and dark for longer in winter than it is in summer? I’m emphasising the point again to highlight the fact you will undoubtedly be in camp for longer in winter. You will quite possibly want to fill your hours there with something constructive. Modern headlamps are great for illuminating activities but you’ll end up using lots more batteries while camping in winter than you do in summer. This is not only expensive but also not fantastic for the environment.
The alternative is to look for ways you can illuminate your camp which don’t rely on batteries. You can make a simple candle holder using a stick and a loop of birch bark as has been featured on this blog here.
You can also use your candle stubs to create a larger candle by melting them into a small tin can and placing a wick into the wax before it sets. This is similar to the large garden candles you can buy but it’s a way of recycling materials you may well have in camp but would otherwise not have a use for.
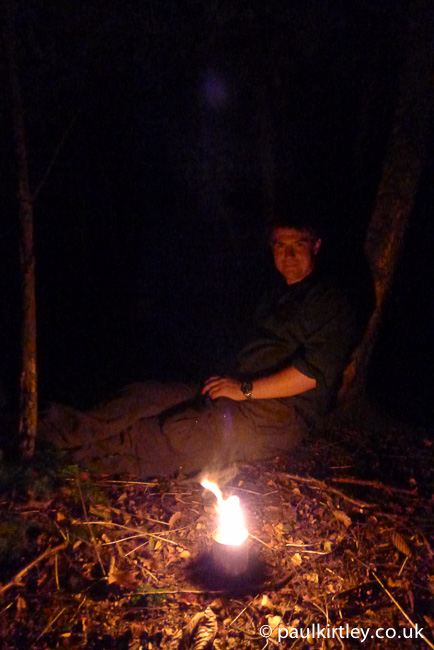
Another option is to use natural materials such as pine resin or birch bark to make torches entirely from natural materials found in the forest. They don’t always burn for very long but they do burn surprisingly brightly.
8. Melt Snow For Drinking Water
Everyone knows that snow is made of water. Yet there is quite a lot of confusion about how to best access it. Some people say you can melt snow in a pot while others recommend to never do this as it melts a hole in the bottom of the pan.
Both are potentially correct. If you fill a pan with snow, particularly if it is not very compacted snow, then apply heat to the bottom of the pan, what typically happens is that the snow in contact with the base of the pot melts, creating water. The volume of this water is less than the volume of snow, due to the amount of air trapped within the snow. This can cause a gap between the water and the snow above it. Also, as it melts out of the snow, this small amount of water can soak up into the snow above, which acts like blotting paper. The resultant air gap between the base of the pot and the snow above both insulates the snow from the heat as well as allows the base of the pot to become very hot. If the pot is made of aluminium, this can cause a hole to be burned into the base of the pot.
This doesn’t always happen mind you. The snow can melt then the snow above drops to take its place and slowly but surely it all melts. The volume of water you get is quite low in most cases though, so be sure to keep adding snow once you have some water in the pot.
This brings me to the better way of melting snow in a pot, which is to either add water to start with if you have access to some, heat it up, then add snow gradually to melt the snow. Alternatively, start with a small amount of snow, melt it quickly then keep adding small amounts of snow so that it melts immediately until you have enough water to add larger quantities of snow at a time. This is much more efficient than starting with a pot full of snow.
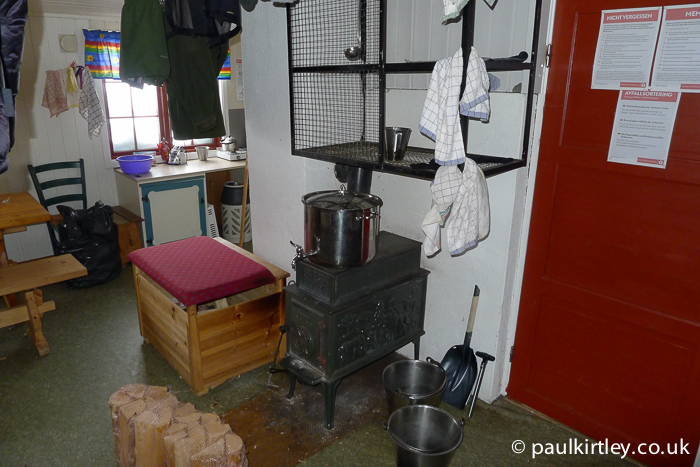
While the above seems really simple, it’s worth having a go as you’ll only learn from experience how much of particular types of snow to use. Snow is very variable. Sometimes it’s light, fluffy and dry. Other times it’s heavy, dense and wet.
If you have access to compacted snow, which you can remove in blocks or chunks around the size of a melon, then you could also have a go at making a Finnish Marshmallow. Take a stick and insert it into the snow or ground near to your fire, angled like a simple pot hanger, so that you can impale the snow block on the end. The block should not be directly over the fire but it should receive a good amount of heat from it. After a while (and it is quite a while since at first the water generated soaks up into the block) the block of snow will start to drip. Place a cup or other container under the drips and collect your water this way. The beauty of this technique is that it works when you don’t have even a metal container to put directly over the fire.
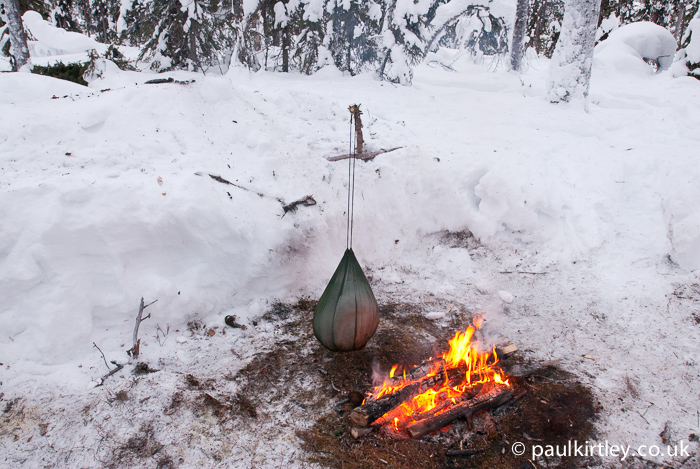
The water generator bag is another variation on melting snow next to a fire. This works well when you have no compacted snow to make a Finnish Marshmallow. Fill a mesh bag or spare piece of clothing with powdery snow, suspend it next to the fire and let it melt by the radiant heat. Once it starts dripping, put a cup or other container under the drips.
9. Sleep Next To A Fire
Sleeping next to a fire is a wonderful experience if you get it right. Or it can be cold, smoky and miserable if you don’t. You need plenty of dry firewood that is going to burn well, not smoke. You will need more firewood than you think. It is commonplace for people to underestimate just how much fuel is needed.
Your fire will be more efficient if it is part of a shelter, which will typically be of the enclosed group shelter type or an open fronted one-person design, either lean-to or free-standing. As described in a previous article, I have slept out in lean-to shelters with a long log fire and no sleeping equipment at low temperatures. As long as you have plenty of fuel – and in this case it needs to be large fuel – you will stay warm all night.
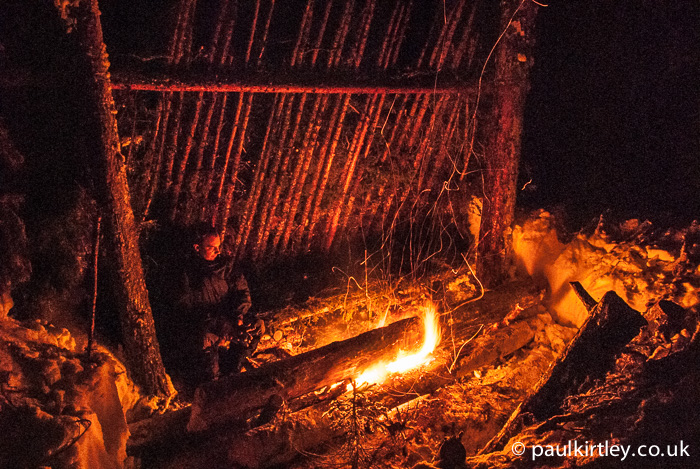
Sleeping next to a fire with no sleeping kit in the arctic might be an extreme first step, though. If you have not much experience in shelter building or deriving warmth from a fire in this way, start with smaller steps and you can work up to a level of competence you need.
You can start by bivvying close to a fire, using a sleeping mat, bivvy bag and sleeping bag, just as you would under a tarp. But beware certain types of wood – particularly sweet chestnut and pine – as they spit a fair amount. This could project a small, hot ember onto your bivvy bag, damaging it or even the sleeping bag below. So, avoid these fuels if possible.
An additional consideration is that you won’t get much benefit from lying parallel to a fire if you are within a well-insulated sleep system. Just as the sleeping kit insulates you from your surroundings, do does it insulate you from the heat of the fire. If you are in a sleeping bag – unless the bag itself is woefully inadequate for the conditions – it is much better to lay head towards the fire. You’ll feel more benefit and you won’t need quite such a large fire, or as much fuel as keeping a parallel fire going all night.
If you want a little more of a challenge, try discarding the sleeping bag and bivvy bag, utilising an old wool blanket instead. This is quite a traditional frontier way of sleeping by a fire, often depicted in Westerns but also what gave great value to the Hudson’s Bay Company point blankets. These blankets are very expensive nowadays but you can pick up army surplus wool blankets for only a few pounds. If you are concerned about being too cold, double up and use two blankets. In my experience two woollen blankets will also keep you dry if it rains, whereas you’ll get damp with only one.
A final consideration about sleeping out next to a fire – whether out in the open or within a shelter – is that once you are using only a blanket or no sleeping kit at all, you need to create some sort of bed beneath you. Modern sleeping mats are worth more than their weight in gold. Until you have tried to sleep on the ground without one, you don’t fully appreciate how effective they are. Without one you lose a great deal of heat into the ground via conduction. Much of your body is in contact with a cold, possibly damp surface, and the clothing in between is also compressed, reducing its insulating properties. You need to break this mechanism of heat loss and create a bed. The best type for use next to a fire is raised up somewhat so that warmth can get under the bed as well.
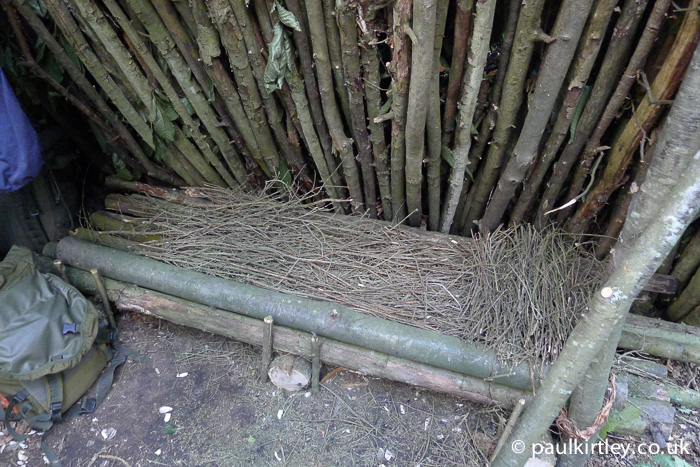
Sleeping next to a fire in the open in winter without sleeping kit might be daunting but take it in progressive steps, learn from your experiences and best of all, invite some friends to take part so you can share the experience. Once you get it right, it’s a very liberating experience. You remove another fear that many other people have regarding the outdoors. Spending a night out in the woods, even in winter, is not as daunting as it might first seem.
10. Work On Your Axe Skills
You need plenty of firewood in winter. Plenty. Whether you are in a heated tent or sleeping out near a fire, you’ll use the fire for warmth rather than just boiling water and cooking your food, as you do in warmer months. Plus you’ll spend more time around the campfire or in your tent due to the short days and long nights.
Consequently you’ll need more firewood at a time of year when more of the materials in the forest are damp/cold. Being able to efficiently process dead, dry standing wood into useable firewood of various sizes, from small splints for kindling through to medium size split wood for boiling billy cans of water to larger fuel for warmth is an important winter woodcraft and camping skill. Rather than using inadequate fuel, pack your axe and use your winter camp outs as the perfect opportunity to sharpen up essential axe skills by making them part and parcel of what you do.
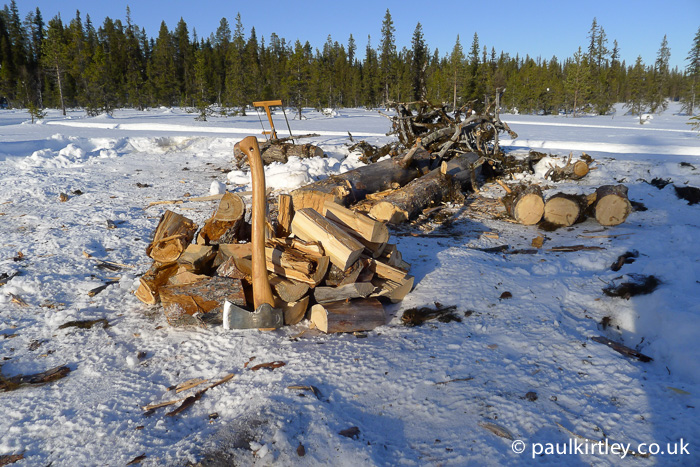
Let me know in the comments below, which of the above skills you plan to spend some time on this winter. Alternatively, if you have another suggestion for winter skills improvemnt, let me an other readers know in the comments too…
Related Material On Paul Kirtley’s Blog:
Bark & Buds: How to Easily Identify 12 Common European Deciduous Trees in Winter
How To Split Firewood On Snow: Key Axe Techniques
Choosing And Using A Snow Shovel For Winter Camping And Travel
A version of this article previously appeared in Bushcraft and Survival Skills Magazine.
26 thoughts on “10 Bushcraft & Survival Skills To Try This Winter”
Hi Paul,
Excellent article once again. Many of the things you’ve listed are on my agenda this winter, it’s been a couple of years since i slept in a fire warmed shelter and i hope next year my daughter will be old enough to come along (she’ll be four).
On a side note, I’ve been listening to your podcast, it’s ace! I’ll be leaving a review for you on itunes soon, i hope there’s many more to come! Personally i’d love to hear one featuring Lars Falt if you get the chance.
Thanks again,
Jamie
Thanks for your comment Jamie.
I’m glad to read that you’ll be out and about this winter trying things out. Great that you are involving your daughter as much as possible too.
Thanks also for your feedback on my podcast and thanks in advance for leaving a review on iTunes.
All the best,
Paul
Hi Paul,
Great list, we’ll be trying to make some natural torches and lanterns to illuminate our heated tent this time (back to Sweden in February). Last time we always used Petzls and such, which was quite bad for our night-vision at times. No matter how hard you try not to shine into peoples eyes, you keep hitting them exactly in the iris with a beam of light 🙂
I’m also in the process of looking up as much as I can in regards of making snowshoes, I’d like to make myself a pair this year, as I think it would be a valuable skill to add, as you never know when your means of transport might fail and you need to walk back to safety.
All the best
Ruud
Hi Ruud,
Nice to hear from you. It’s good that you are planning another trip North. I think you find it as addictive as I do! 🙂
Good plan about trying the natural light in the heated tent. Two tips for you – 1/ be very careful with a naked flame near to hot canvas; and 2/ don’t place your candles too close to the stove they soften and burn much more quickly than usual.
Have fun and I look forward to hearing about your adventures 🙂
Warm regards,
Paul
Hi Paul,
Great article, I will definitely be attempt to try all the skills you have suggested although, living on the south coast the likelihood of snow is slim but I live in hope!
I have been an avid reader of your blog for a couple of years now (it’s fantastic by the way) and one of the phrases which crops up a lot “dead standing wood” and while I understand what it is I wondered if you could provide some tips on identifying it?
Kind Regards
Jake
Hi I am going to hone my fire lighting skills using bow and drill and I’m also going to sleep in a leanto shelter next to a long fire
Good stuff Allen. Let us know how you get on.
Warm regards,
Paul
Wonderful stuff. Always working on the basics. Smoother. More efficient. Faster. It just started dumping here. Expecting 50cms and -16c in the Valley.
Hi Susanne,
I hope you are enjoying the snow. Yet to be properly cold here, even in Scotland.
I’m looking forwards to a few Scandinavian forays in the pipeline.
“Smoother. More efficient. Faster” – indeed. I’m always revisiting the basics too.
Warm regards,
Paul
Thank you Pail ,definately good ideas there for honing my skills in the winter. Tree identification and damp day basic firelighting are something I intend to practice through the next months. However, being in Somerset UK, the opportunity to dig a snow hole is sadly not going to happen!
OUTSTANDING Paul.
THANK YOU.
This is great! I see a few skills I need to either learn or improve upon and one I hadn’t heard of. I’m eager to get out to try the Finnish Marshmallow. We’ll give it a go when we get some snow and are out to ice fish.
your article has inspired me to push and learn more from the outdoors… Remember working on my Bowdrill.. Could get a coal repeatedly, but that damn tinder bundle just wouldn’t light… Now in a new area, new and also in Algonquin Park.. Bobcats, Linux, fishers, wolves, minks etc… Excited to read their stories in the snow. Great article and suggestions to try… One I have made but never slept in.. Quinzees, being claustrophobic has its challenges 🙂 lol
Rhonda
Thank’s for all ideas about being outdoor in winter. I’m going to see some animal tracks with my son for sure (as we did for a past few winters) but this winter we make ourselves a cup of pine needles tea, while we are out there.
Best regards an happy new year,
Milenko
Some great things to aim for this winter – just hoping for some more snow to settle! I would add foraging for food, not much being edible at this time of year, and making arrows – a bit like Dustin Hoffman in the snow in Little Big Man…
Hi Eden,
Thanks for your comment. Yes, there’s always lots to do in the winter. It would be good to get some “proper” snow wouldn’t it.
And Little Big Man…thanks for reminding me of this film. It’s a long time since I’ve watched it. I’ll have a to dig it out one winters evening for a revival viewing.
Warm regards,
Paul
Great article, certainly will be practising my winter firefighting, and my winter tree identification, the course has really brought me on leaps and bounds.
I have however been a fan of making a corrugated cardboard torch and it works surprisingly well in windy conditions with a long burn time. I’m sure you have done before, using a tin of some sort, I used a ‘ brasso ‘ tin rolled up corrugated cardboard packed 1 inch below the top and then poured hot wax into the tin slowly until well saturated, leave to cool and then light.
The tin I used has a metal lid, so easy to put out. And it burns bright for hours.
I’m sure there is a demo on YouTube, I suppose birch bark would also work well as a cardboard sub.
Would be interesting to hear if anyone else has used this.
Cyril
Hey Cyril,
I’ve done it with cardboard but not with birch bark. I can imagine that it could be pretty incendiary.
One to add to the list I think…
Cheers,
Paul
LOL … Are you thinking that the birch bark and candle wax would be more like a flame thrower, think I might try that one in be back yard first.
That’s exactly what I’m thinking Cyril! 🙂
Thank you for the nice winter post. I myself live in a northern hardwood forest & if I were to only enjoy the outdoors & practice bushcraft when it was pleasant out I would not see much of the woods. After I read this post, it inspired me to go on an evening hike in the park. It surely is a different experience. One thing that I focused on & was interested in was my vision. Looking down at my feet in total darkness as I walked & they just looked like black bricks moving back & forth. Vision detail is so poor at night & it’s a skill to practice doing “all thing bushcraft” in the dark. Thank you for your time.
http://aroundthecabin.com/category/blogs/bushcraft-science-history-jason/
Thank YOU Jason. Great stuff.
Boy oh boy! loads of quality stuff in here…you are really sharing great stuff. Paul, you are the most complete bushcraft expert I’ve ever seen.
Just went out for a bimble in the 6″snow covering the peak district to have a play – only slightly marred by having Frozen’s ‘Let it go’ circulating in my head…
Again Paul, you continue to outdo yourself. The article is comprehensive and reassuring (for those who may be apprehensive of doing things in winter) as you are speaking from true experience. You are a precious jewel to the Bushcraft community.
I do intend to be out and about with my wife, and we endeavour to do as many of these things as possible. I will post pictures on the on-line course page for members to see.
Thank you so much for all this wealth of information.
Warmest wishes,
Marcel
Thank you Marcel. I’m glad this has further spurred you to do more in the coming months. I look forwards to seeing the photos in the OE members Facebook group.
Warm regards,
Paul